Showing posts with label Decoupage. Show all posts

Apr 27, 2014

These shoes were made for...


Do you have a pair (or two) of shoes that you can't throw away, even though they already look completely worn out? Well, I know how you feel. Meet one of my favorite pairs of shoes. They are comfortable, they have red laces and we've been walking around together for about two years. :)


Naturally, all that walking left a trace on the soles and heels, so I've decided to do something about it.


I had this project on my mind for some time now. I've seen similar projects on Pinterest and other DIY blogs and here is my version.


For this project I used:

Rice paper with text pattern
Art Potch Decoupage Glue and Lacquer (matt and glossy)
Paintbrush
... and, of course, old shoes


Step 1: Prepare your shoes – clean the area you want to decoupage. I also sanded the most damaged parts of the heels a little bit.


Step 2: Prepare the rice paper. Measure how much paper you need and rip it into smaller pieces.


Step 3: Use a paintbrush to cover heels with decoupage glue (I used Art Potch matt), and stick the pieces of the rice paper onto it. Cover them with another layer of Art Potch and let dry completely.


Step 4: Carefully cut off any excess of the paper (I used the exacto knife and nail scissors to do that.)


Step 5: Seal your work with another layer of Art Potch. I used Art Potch glossy for this step to make my heels more resistant to water and dirt (I mean, we don't want to see them ruined by rain, don't we).


Let it dry...


... and you've got yourself a „new“ pair of shoes! :)


Nov 2, 2013

DIY "Cracked" Vases

What do you do with empty jars? Do you throw them away or do you pile them? I realized recently that I have a lot of empty jars of all sizes that are just lying around the apartment. So, I decided to give them a new life with a few recycling projects. 
Let's start with these vases, shall we?


What you need:

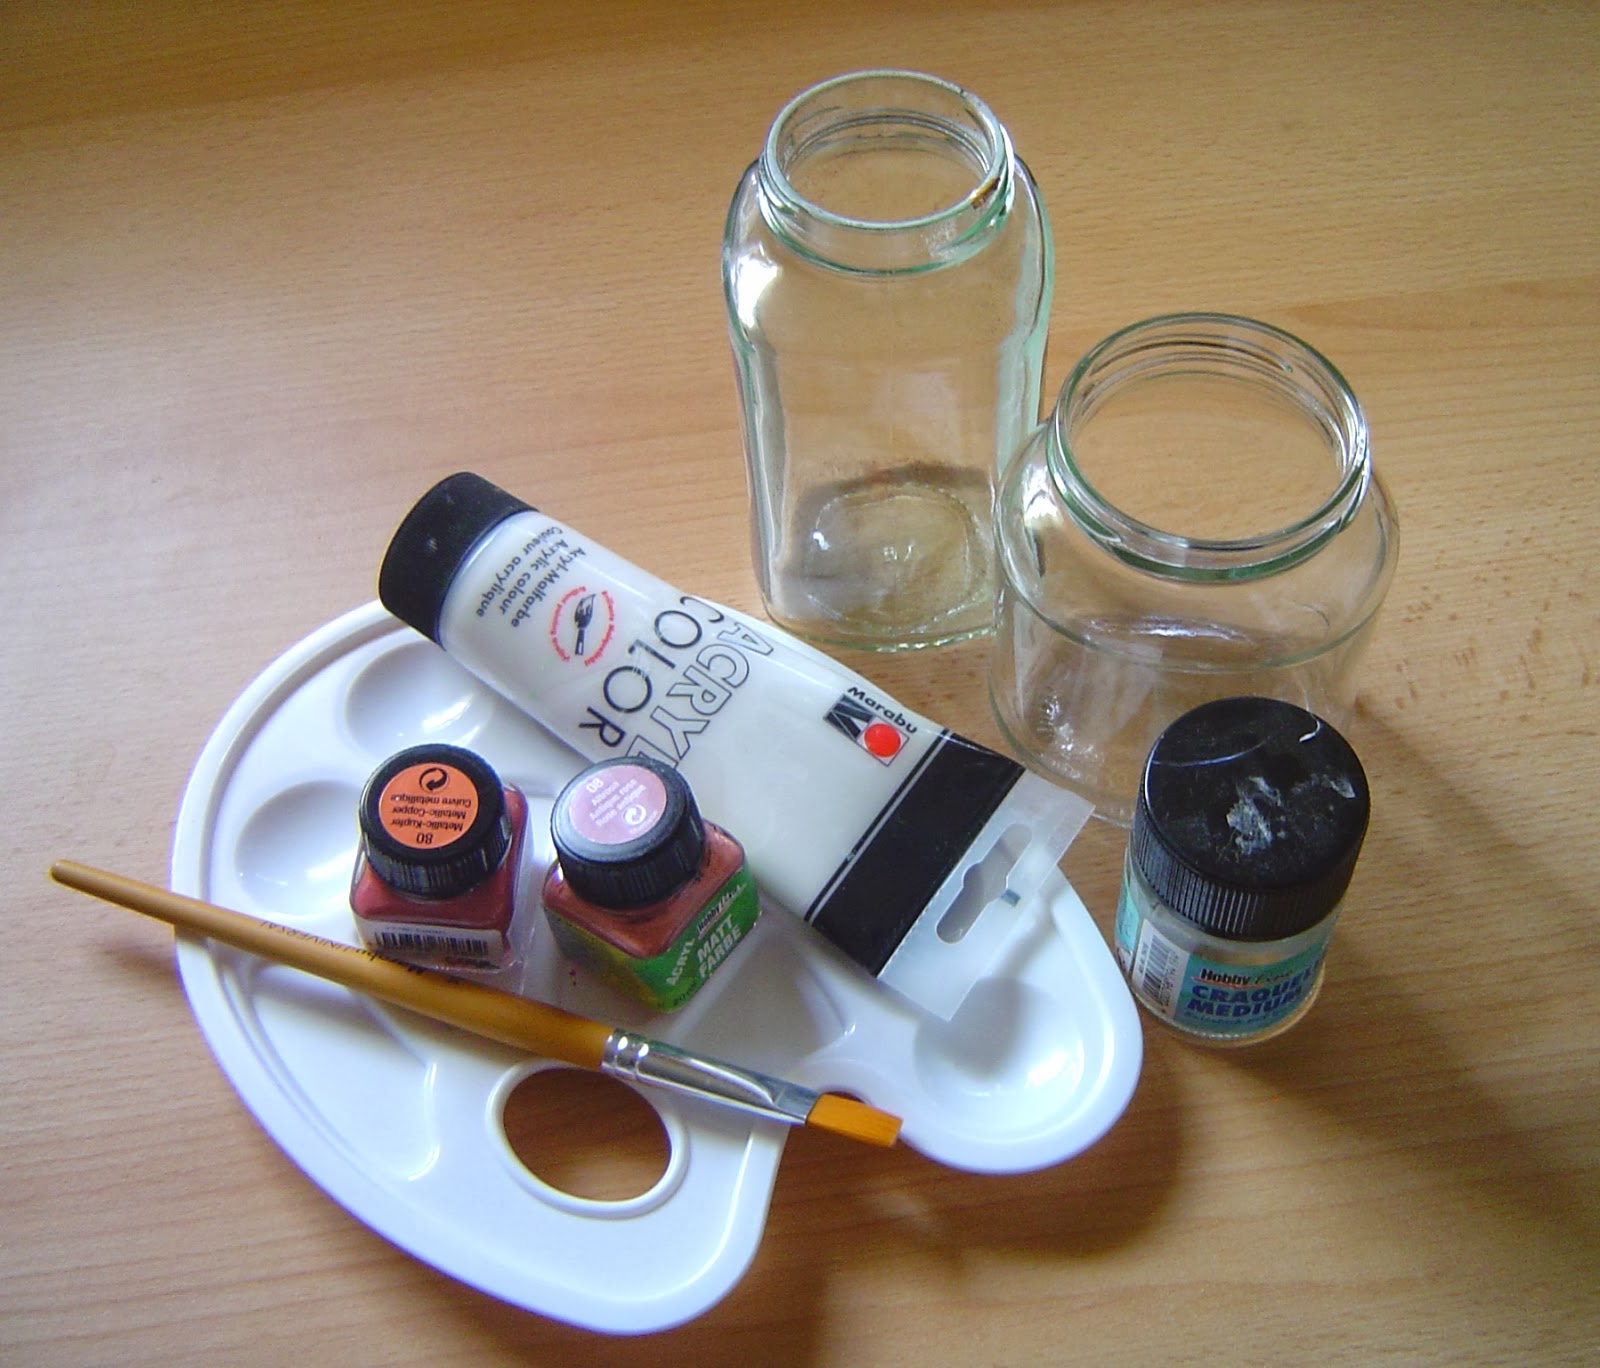
Empty jars
Crackle lacquer
Paint
Napkins and/or rice paper (optional)
Mod Podge
Brushes


Step 1: Clean jars and remove all labels.
Step 2: Apply an even coat of crackle lacquer in one direction only. Let it dry until it stops being sticky.


Step 3: Apply color in the same direction. You will notice how cracks appear as color dries. Thinner coat of color should produce a finer (smaller) cracks, and thicker crackle can be produced by applying a heavier coat of color.
Warning: Do not apply color twice over the same spot because it will make the color peel and you will get a big ugly hole!


Step 4: Let it dry completely.
Step 5: You can leave the vases as they are or you can additionally decorate them. I cut some motives from napkins and rice paper and glued them on the jars with some Mod Podge.
Step 6: Apply a coat of Mod Podge over the whole jar to seal and protect your work.


And you are done! Now you just need some flowers to put in your new beautiful vases. 


Sep 14, 2013

Turn an old notebook into a charming diary


When I decided to start a blog, the first thing I realized was that I need some sort of a diary to write down my ideas and information that will help me in making my own blog.


I searched through my stuff and I found this old diary.  And, when I say old, I mean really old. It dates from 1982, which means it's actually older than me. It belonged to my grandpa, but it was barely used...so it was perfect for this project.


If you have an old diary or notebook lying around your house and you would like to give it a new life, here is how.

You'll need:
  •          An old notebook (obviously)
  •          Mod Podge (or Art Potch, or something similar)
  •          Decorative rice paper (you can also use decoupage paper or napkins)
  •          Brush(es) and scissors
  •          Bucket with water and a towel
  •          And maybe some color (depending on the color of your notebook's cover)


Step 1: If your notebook has a dark cover like mine, paint the cover with some light acrylic paint. I used white. Do the same if the notebook cover is colorful or has some design on it, you don't want it to show underneath your new motifs.

(side note: I applied only one layer of the paint using a sponge so my brush moves are showing underneath the paper, but I was going for this slightly 'distressed' look. If you want to avoid this, just apply several layers of paint.)


Step 2: While the paint dries, prepare your rice paper. Cover your notebook with the paper and measure how much of the paper you need. Leave some extra paper on the sides to glue it on the inner side of the cover and cut it. If you are using paper/napkins with smaller motifs you can just cut out the individual motifs.


Step 3: Soak the paper in water for a minute, and lay down on the towel to get rid of the extra water. (Don't do this with napkins!)

Step 4: Cover the front cover with Mod Podge and adhere your paper to the cover. Allow it to dry completely. Repeat with the spine and back cover. (Or just glue on the motifs in the desired order.)

Step 5: Seal with another layer of Mod Podge on the top. Trim any excess of paper...and voila! You have a brand new notebook :)